How to Display Content on Your Screen
There are two ways to get content on your screen: (1) using Presentations, or (2) assigning a Default Display. Follow the steps below.
Method 1: Use Presentations
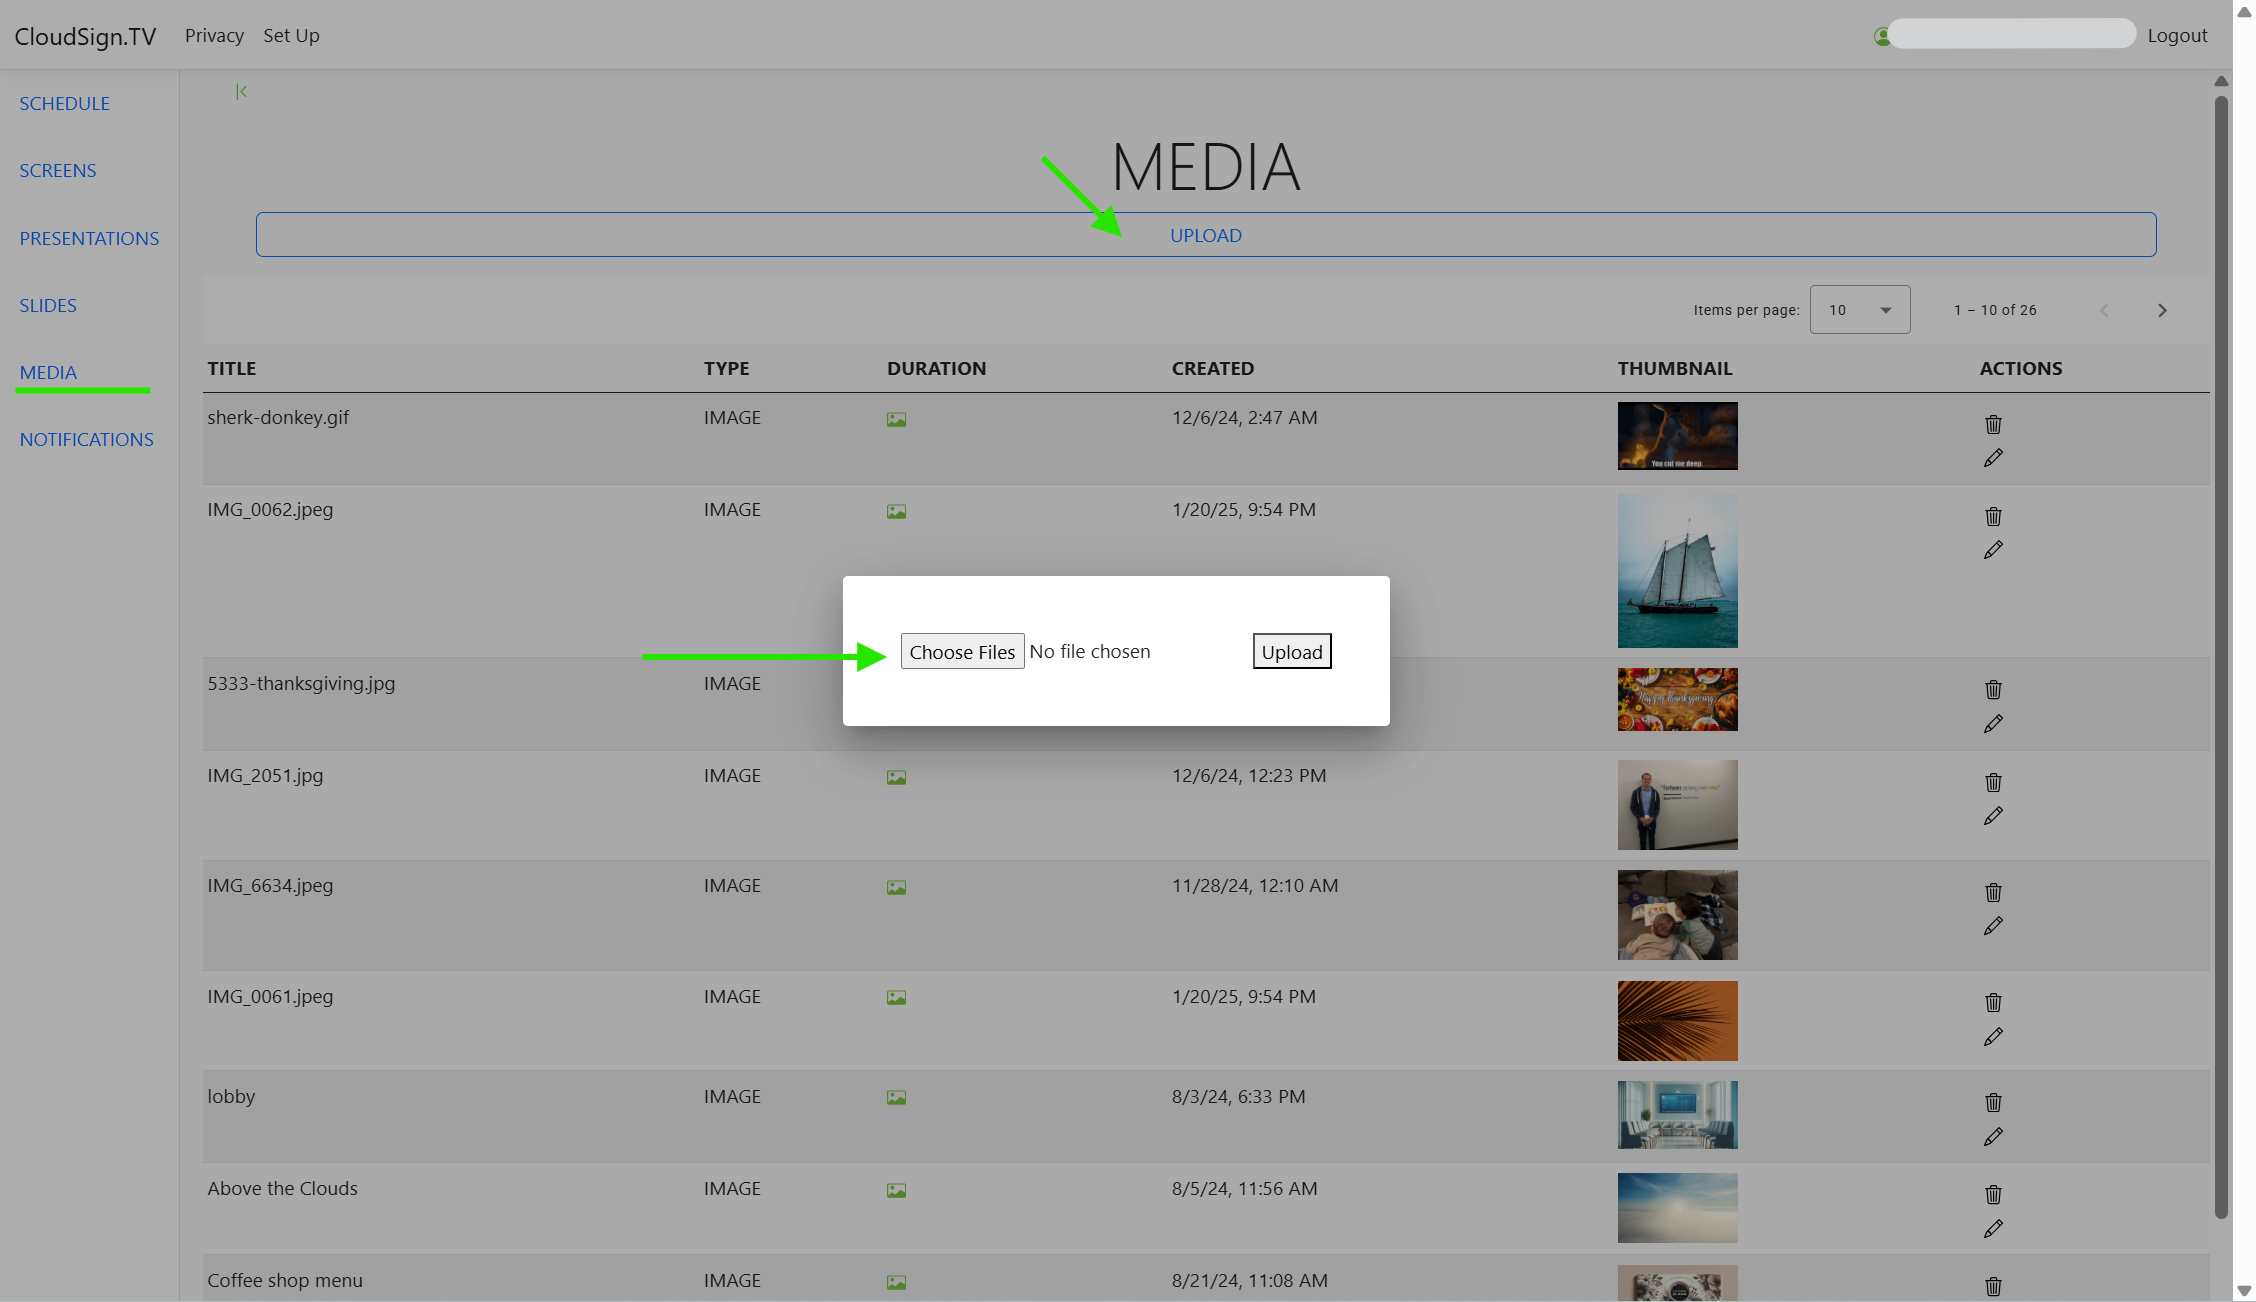
Step 1: Upload Media
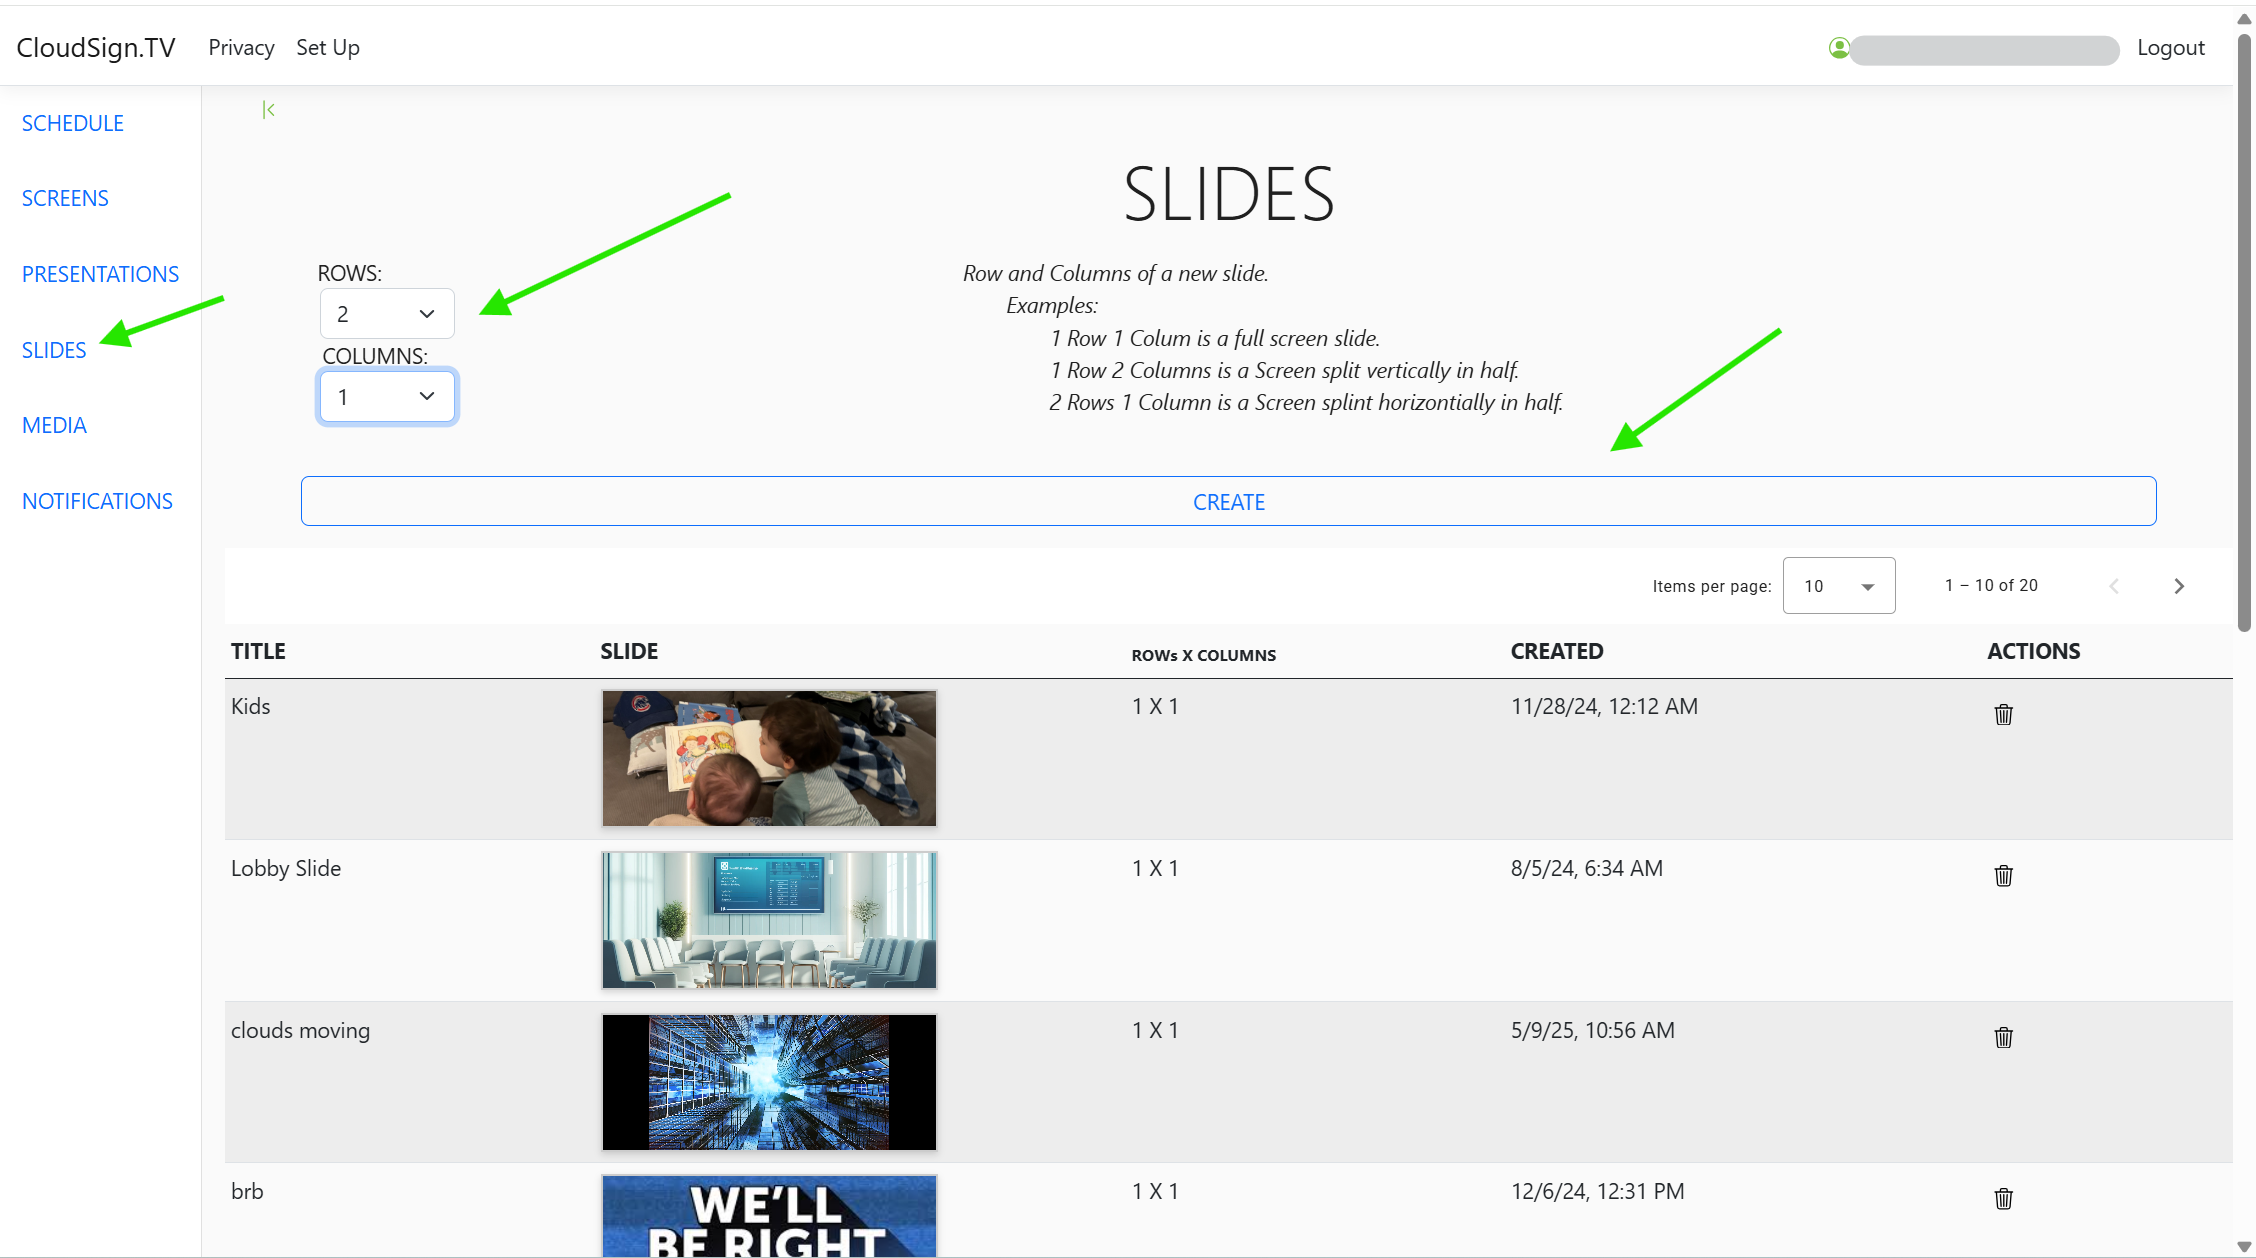
Step 2: Create Slides
Navigate to the Slides page, and create a new slide using the media you just uploaded.
Decide on the slide layout by selecting rows × columns:
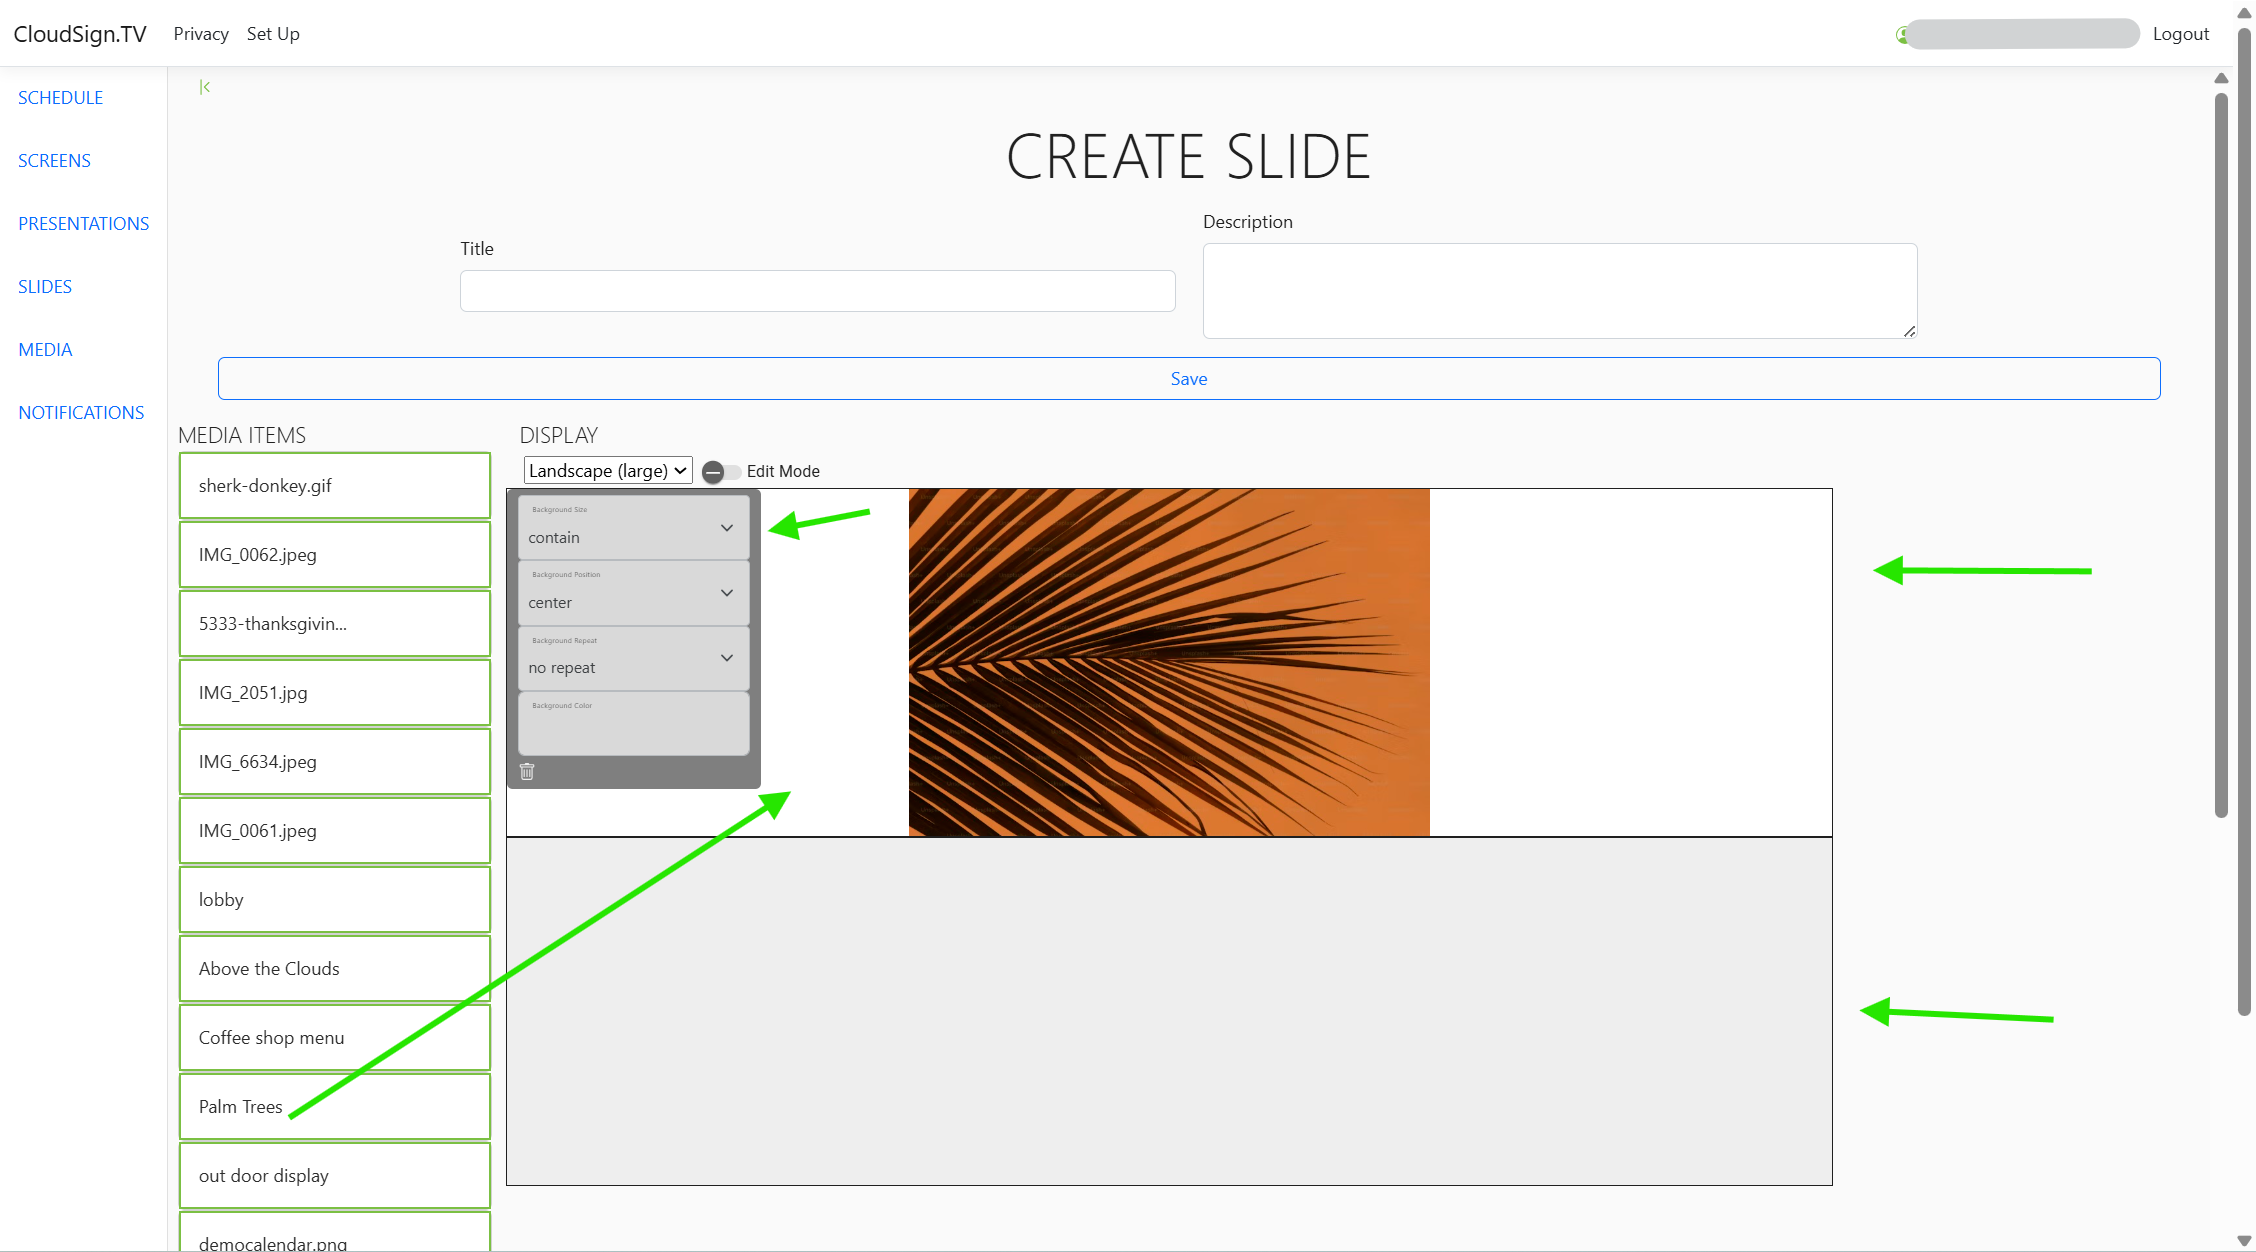
 In the slide creation interface, drag your media items into the drop zones. Use the control box (usually in the top left) to adjust positioning, cropping, or scaling.
- 1 × 1: single full‑screen item
- 1 × 2: two side‑by‑side media items
- 2 × 1: one media item on top, another below
In the slide creation interface, drag your media items into the drop zones. Use the control box (usually in the top left) to adjust positioning, cropping, or scaling.
Step 3: Build a Presentation
Go to Create Presentation and assemble it:
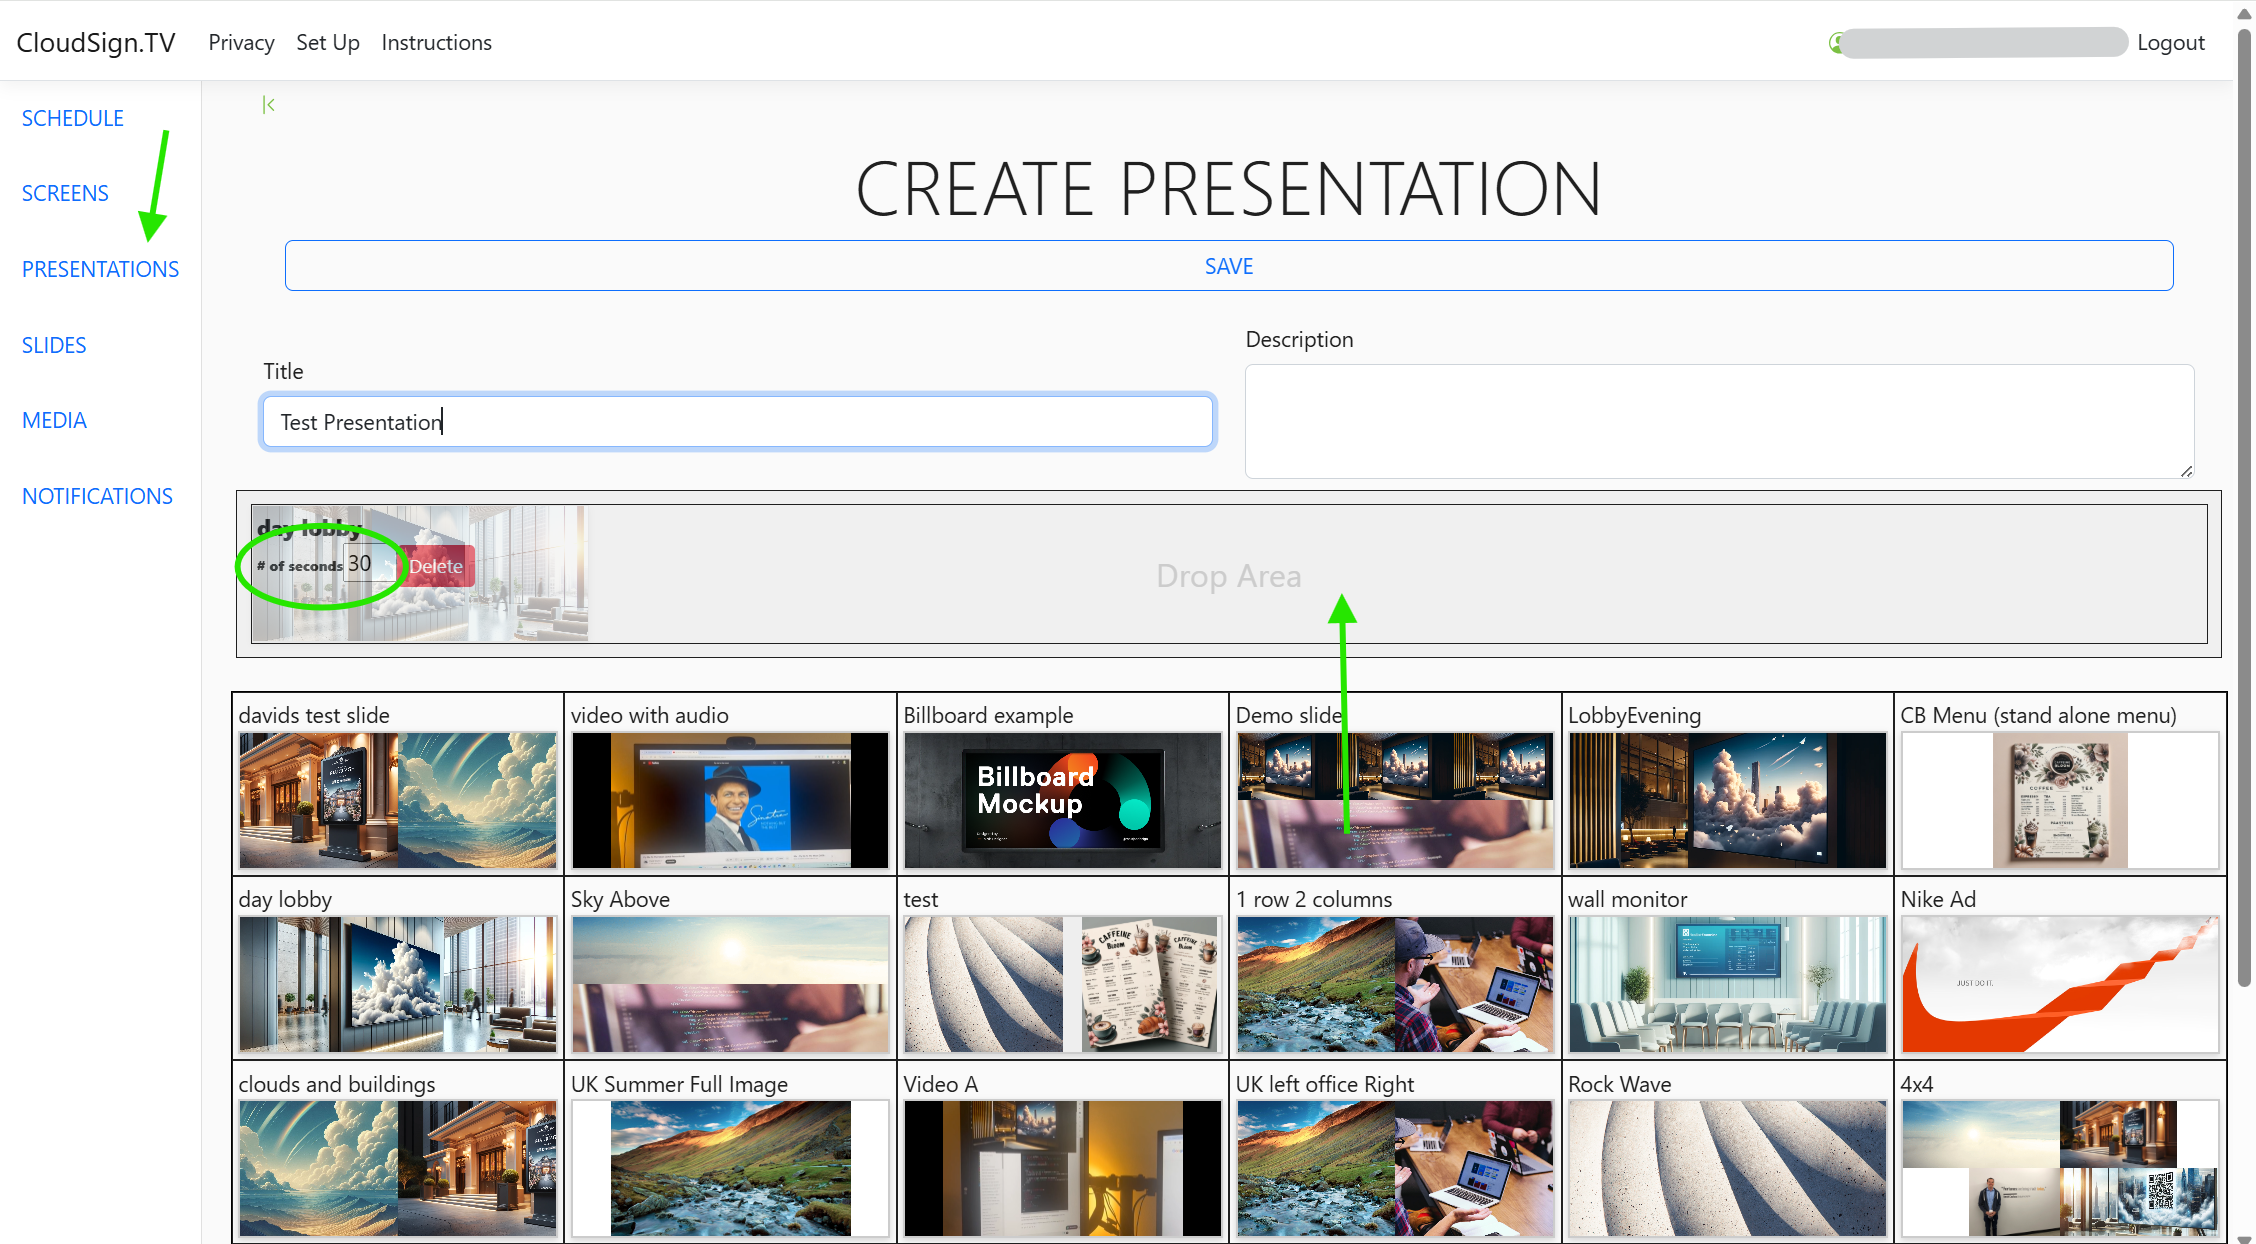
- Drag your slides into the presentation drop area in the order you want them to play.
- Set how long (in seconds) each slide should display.
- Add a title and description.
- Save your presentation.
Step 4: Schedule Your Presentation
Open the Schedule page.
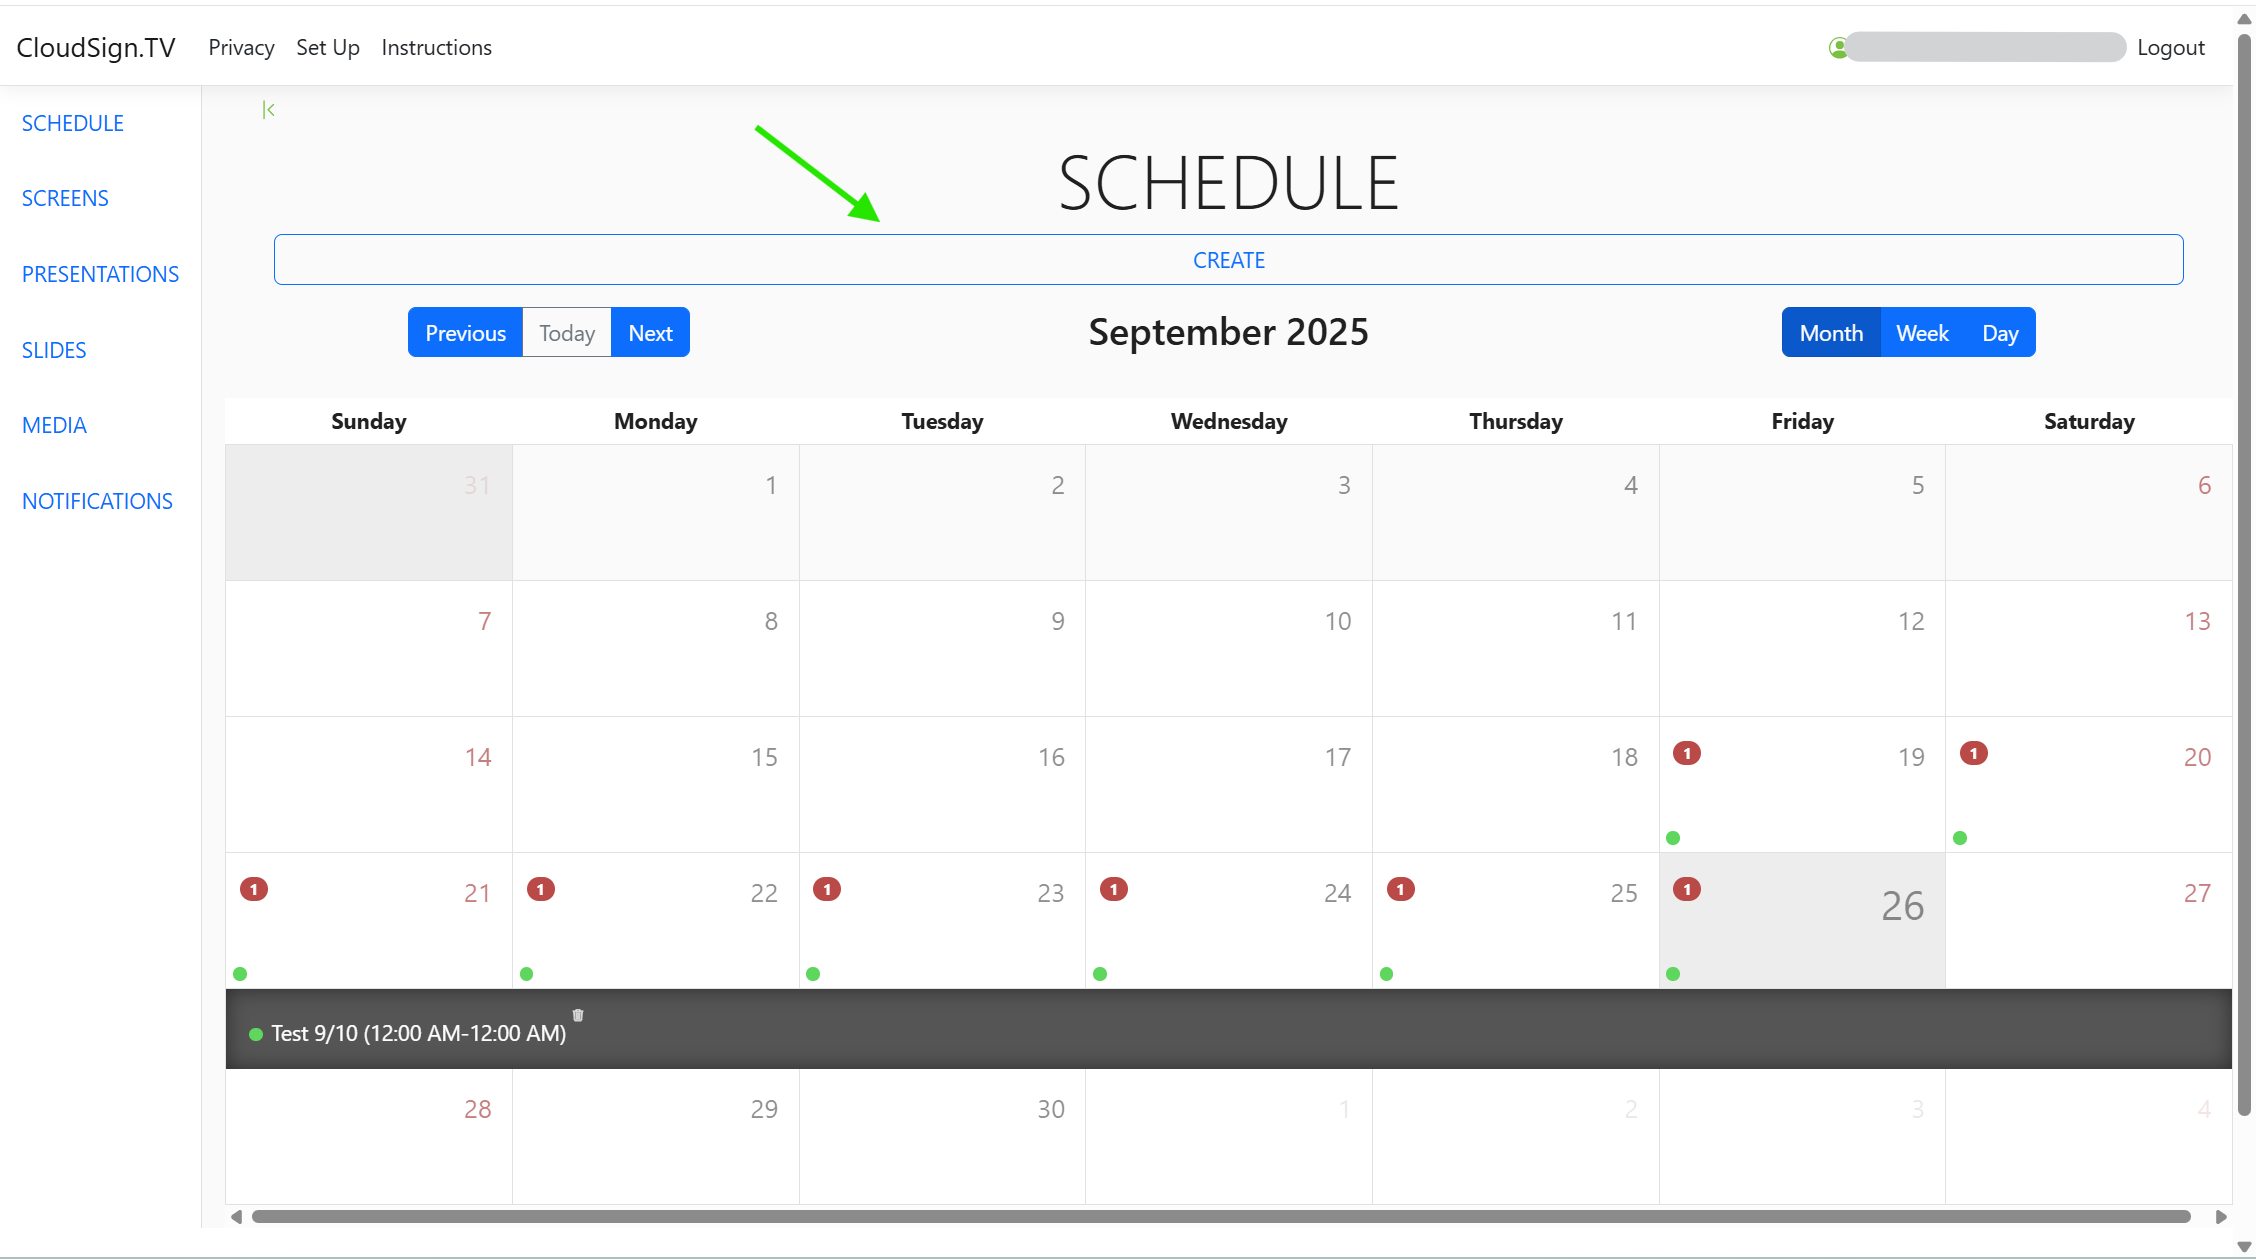 Your presentation(s) will appear in step 3 of scheduling.
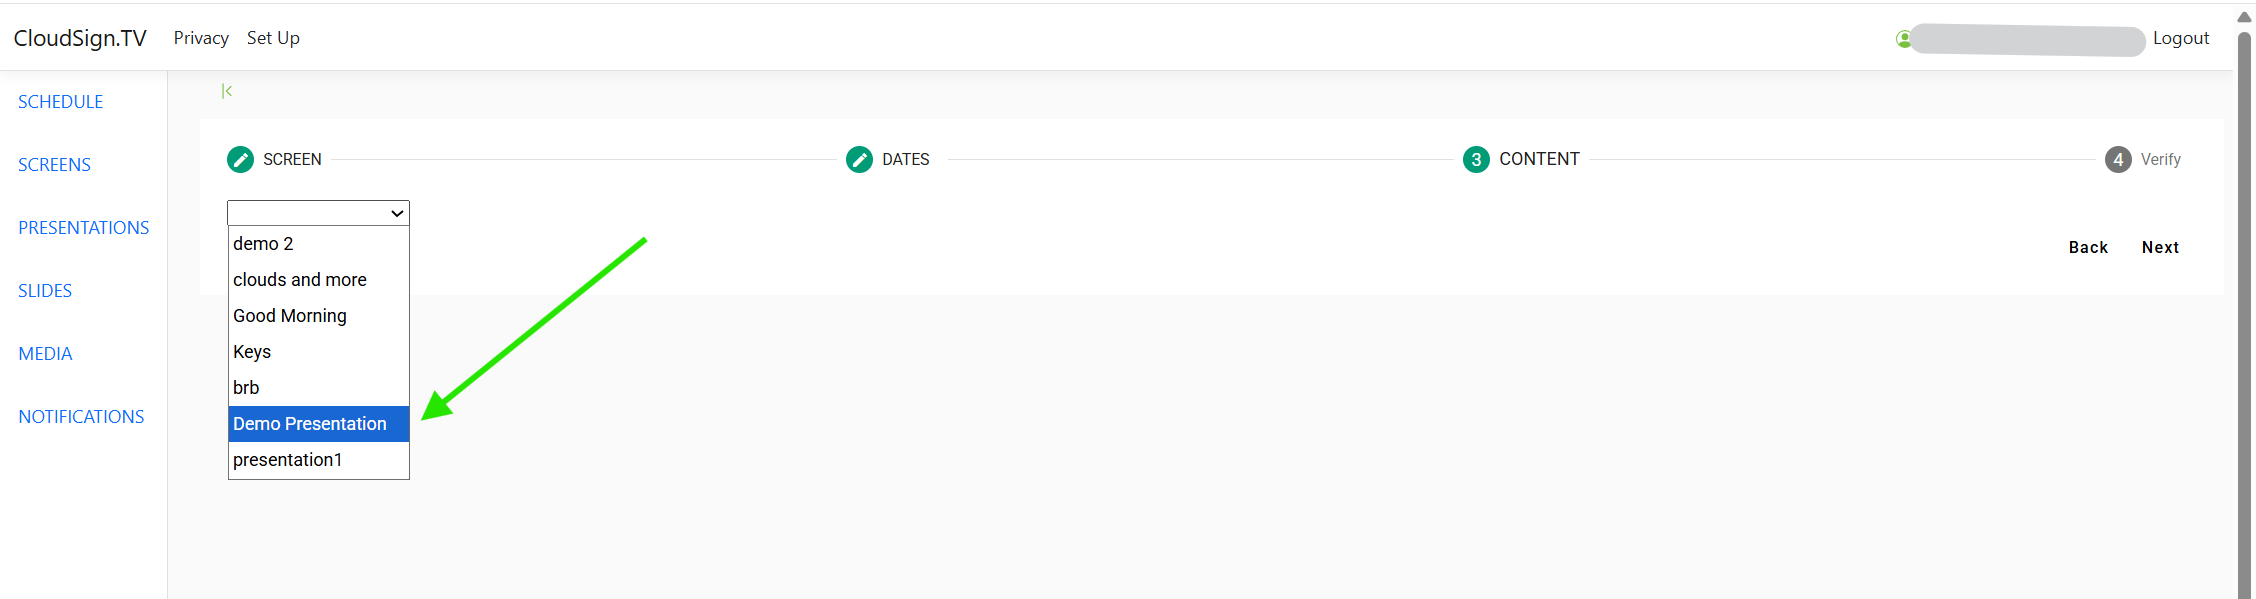
Choose when and where (which screen) the presentation should run, and click Save. You’ll be returned to a calendar view showing your scheduled content.
Your presentation(s) will appear in step 3 of scheduling.
Method 2: Use a Default Display
If you’d like to show a static image instead of a rotating presentation—either between scheduled periods or continuously—you can set a Default Display.
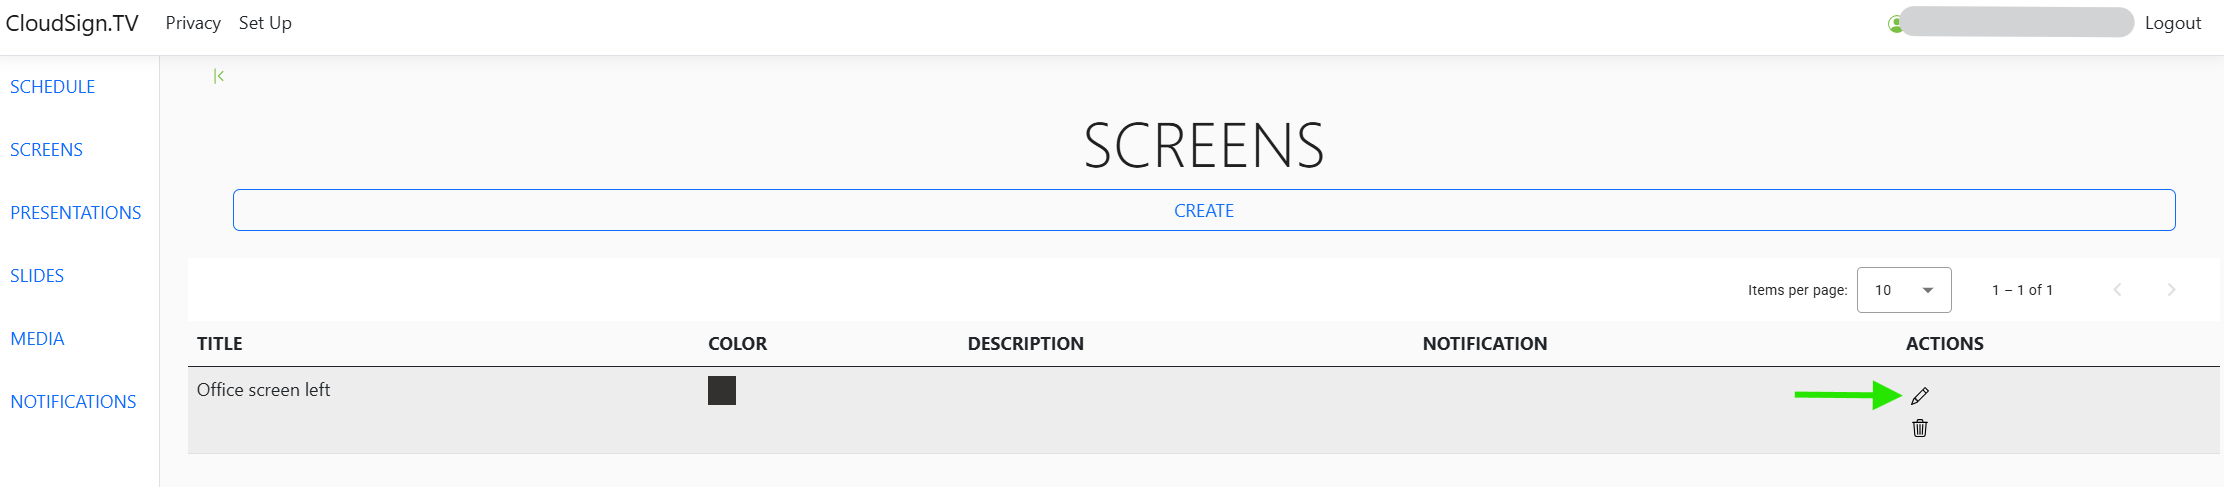
Step 1: Edit the Screen
Step 2: Assign a Default Display
Within the screen edit interface, locate the Default Display option. Select or upload your static image or media item to assign it.
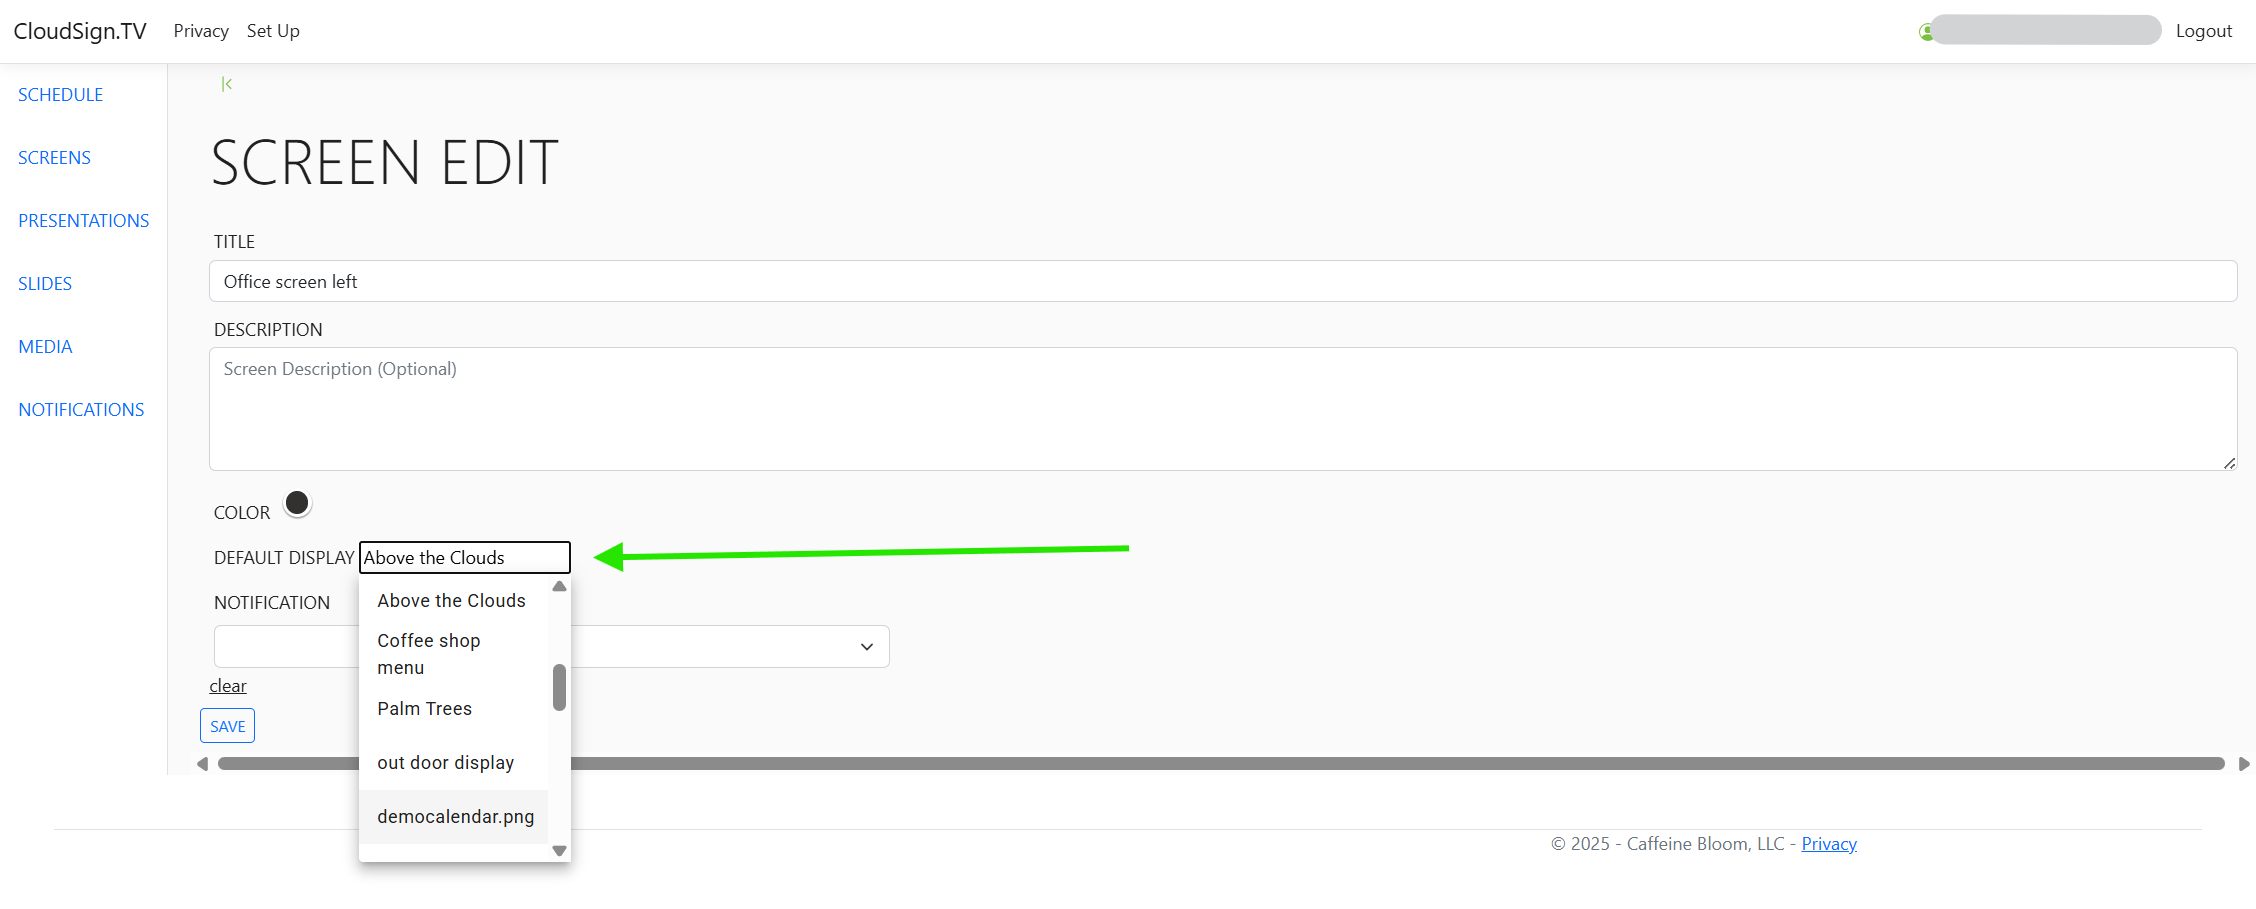
Once saved, the default display will appear when no scheduled presentation is running (or always, if you do not schedule anything else).